
Ready to tackle your DIY design and interior projects? Start by arming yourself with must-have tools like precise measuring instruments such as tape measures and laser levels. Ensure straight cuts with versatile cutting tools like utility knives and handsaws. Don't forget the power drill for efficient tasks and safety gear for protection. From choosing the right paint supplies to mastering hammer and nails, every tool plays a crucial role. Need more tips to enhance your projects and skills? Keep exploring to discover expert insights and elevate your DIY game to the next level.
Key Takeaways
- Utilize levels and squares for precision in alignments and cuts.
- Sand with progressive grits in circular motions for smooth finishes.
- Invest in quality pliers, wrenches, hammers, and nails for varied tasks.
- Select appropriate paints, brushes, and techniques for diverse finishes.
- Maintain tools for safety, accuracy, and longevity in DIY projects.
Measuring Tools
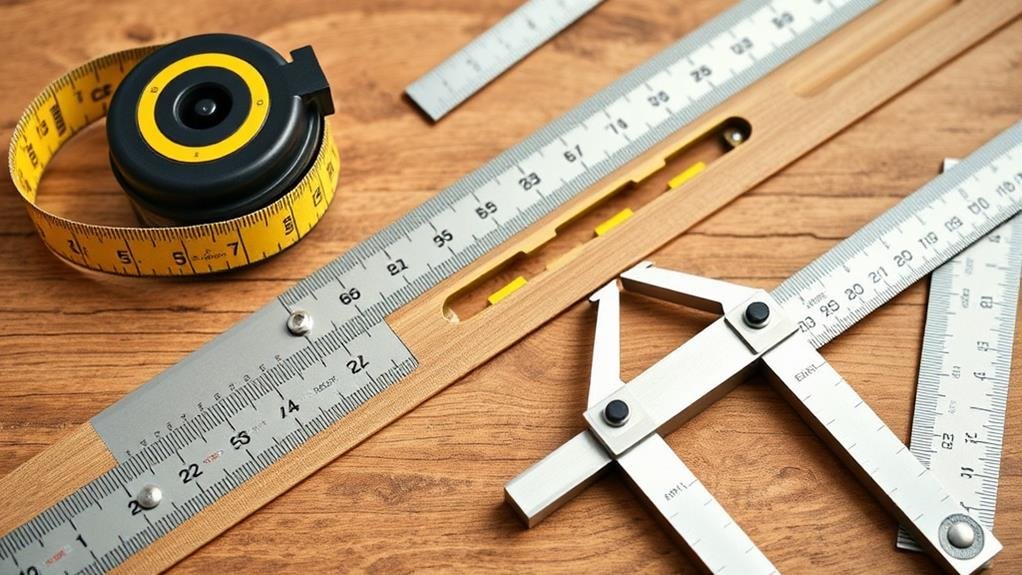
When it comes to designing and creating, accurate measurements are the foundation upon which successful projects are built. Imagine a blank canvas awaiting your creative touch – but before painting your masterpiece, you must ensure every line and angle is precise.
Essential tools like tape measures, laser levels, measuring wheels, height gauges, digital calipers, angle finders, and contour gauges become your trusted allies in this quest for precision.
Tape measures, the classic companion, extend to capture lengths effortlessly. Laser levels cast perfect horizontal or vertical lines with futuristic precision. Measuring wheels roll over distances, delivering accuracy with each turn. Height gauges stand tall, ensuring uniformity in vertical distances.
Digital calipers provide exact measurements down to the finest detail. Angle finders help you conquer tricky corners, ensuring flawless joints. Measuring tapes flex and bend to capture the most intricate contours, while contour gauges memorize unique shapes with ease.
With these tools in hand, your projects will stand not just on creativity but on a solid foundation of accuracy and precision.
Cutting Tools
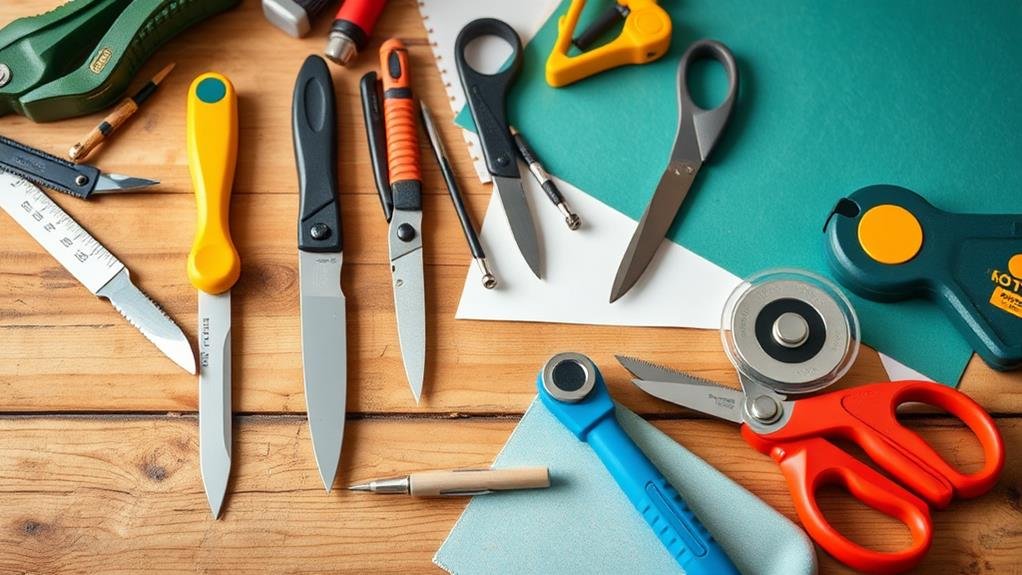
Amidst the realm of DIY design tools, the realm of "Cutting Tools" emerges as the sharp guardians of your creative visions. Mastering cutting techniques and maintaining your blades are essential for precise and efficient project outcomes.
Cutting Tools Table
| Tool | Description | Best For |
|---|---|---|
| Utility Knife | Versatile tool for precise cuts | Detail work |
| Rotary Cutter | Ideal for fabrics and intricate shapes | Quilting projects |
| Handsaw | Hand-held saw for wood and plastic | Small carpentry tasks |
When it comes to cutting techniques, ensure your cuts are clean and accurate by using the right tool for the material. Take the time to maintain your blades with regular cleaning and sharpening to prolong their lifespan and optimize performance. A well-cared-for blade will effortlessly slice through your projects, making your DIY endeavors a breeze.
Power Drill

Alright, ready to take your DIY skills up a notch?
Let's talk Power Drill – those trusty tools that can make your projects a breeze.
From choosing the right drill bits for the job to deciding between corded and cordless options, there's so much to explore.
And remember, safety first! Always double-check precautions before you drill into your next masterpiece.
Drill Bits and Usage
Navigating the world of DIY projects becomes infinitely easier when you have a good understanding of drill bits and how to utilize them effectively with your power drill. Dive into the realm of drill bits with a mix of excitement and know-how. Here's a handy table to help you grasp the essentials:
| Topic | Brief Overview |
|---|---|
| Drill Bit Types | Explore various types like twist, spade, Forstner, and hole saw. |
| Drill Bit Materials | Learn about materials such as high-speed steel, cobalt, and carbide. |
| Drill Speed Settings | Understand how to adjust the speed based on the material being drilled. |
| Drill Bit Storage | Discover tips on storing bits in a dry place to prevent rusting. |
| Drill Bit Maintenance | Master the art of cleaning bits after use to prolong their lifespan. |
Each type of bit offers a different function, from creating precise holes to larger cutouts. Remember to match the bit size to your project needs, and always prioritize safety when drilling. Happy drilling!
Corded Vs Cordless
When diving into the world of power drills, one crucial choice to make is whether to opt for a corded or cordless model.
Corded drills offer consistent power without the need for charging, making them ideal for heavy-duty projects. They excel in scenarios where continuous usage is required and noise levels aren't a concern.
On the other hand, cordless drills provide the convenience of mobility and flexibility in various workspaces. The battery life, charging times, and tool weight are factors to consider when choosing a cordless model.
While corded drills are typically more powerful, cordless drills offer portability benefits and allow you to work in areas without a power source nearby.
For quick tasks or projects that require movement around a workspace, cordless drills are a popular choice. Understanding your usage scenarios will help determine whether corded power or cordless convenience suits your DIY projects best.
Safety Precautions
Choosing between a corded or cordless power drill is just the beginning of your DIY journey.
When it comes to safety precautions, fire safety is paramount. Ensure your workspace is organized, keeping flammable materials away from heat sources. In case of emergencies, have a first aid kit nearby.
Proper chemical handling is crucial; always read instructions and wear personal protective equipment. Prioritize electrical safety, checking cords for damage before each use.
Ventilation is also important to prevent hazardous fumes from accumulating. Regular tool maintenance is key to safe operation, so inspect your power drill before starting any project.
Remember to practice safe lifting techniques to avoid strains or injuries. By following these guidelines, you can enjoy your DIY projects safely and efficiently.
Paint Supplies
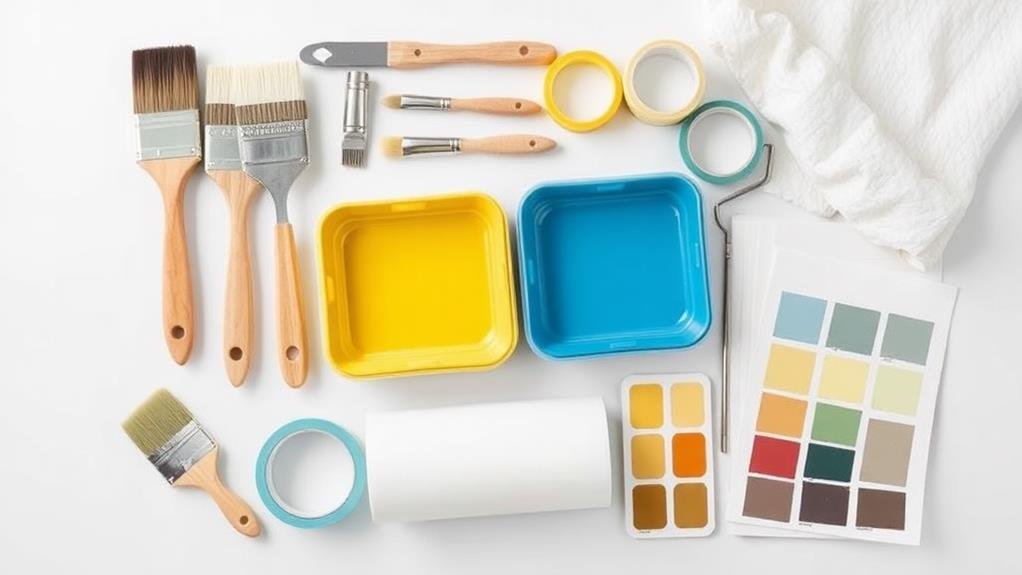
Amidst your creative endeavor, the allure of colorful paint supplies beckons. As you dive into your DIY design project, consider the following essential paint supplies:
- Paint Types: Explore various paint options such as water-based, oil-based, or chalk paint to achieve the desired effect on different surfaces.
- Color Selection: Delight in the vast array of hues available and unleash your creativity by choosing the perfect colors that resonate with your design vision.
- Application Techniques: Experiment with different methods like brushing, rolling, or spraying to achieve diverse textures and finishes for a unique touch to your space.
When selecting your paint supplies, consider not only the paint types, color selection, and application techniques but also the finish options, such as matte, satin, or glossy, to complement your design aesthetic.
Armed with the right paint tools like brushes, rollers, and painter's tape, you're ready to transform your space with splashes of color and creativity.
Safety Gear
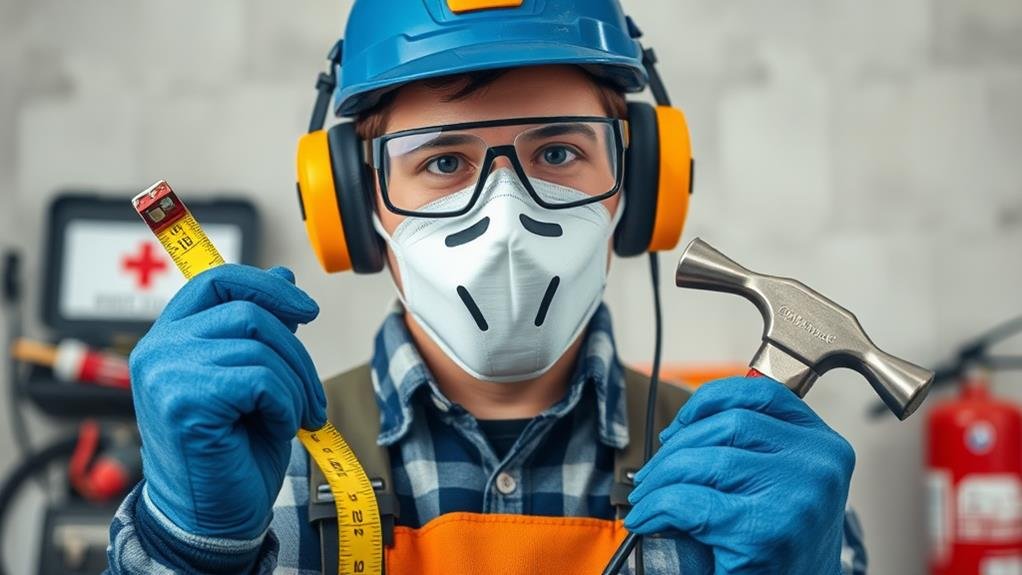
As you embark on your DIY design journey, ensuring your safety should be a top priority. When engaging in various interior projects, it's crucial to have the right safety gear to protect yourself from any potential hazards. Two essential items you should always have on hand are protective eyewear and hearing protection.
Safety Gear Essentials
| Safety Gear | Description |
|---|---|
| Protective Eyewear | Shields your eyes from debris, dust, and harmful chemicals during painting, sanding, or cutting tasks. It's crucial to prevent eye injuries that could result from flying particles. |
| Hearing Protection | Safeguards your hearing from loud noises produced by power tools, hammering, or drilling. Long-term exposure to high decibel levels can cause irreversible damage to your hearing. Make sure to wear ear protection to minimize this risk and preserve your hearing health. |
Equipping yourself with protective eyewear and hearing protection will not only ensure your well-being but also make your DIY projects more enjoyable and stress-free. Stay safe and protect your senses as you bring your design visions to life!
Level & Square
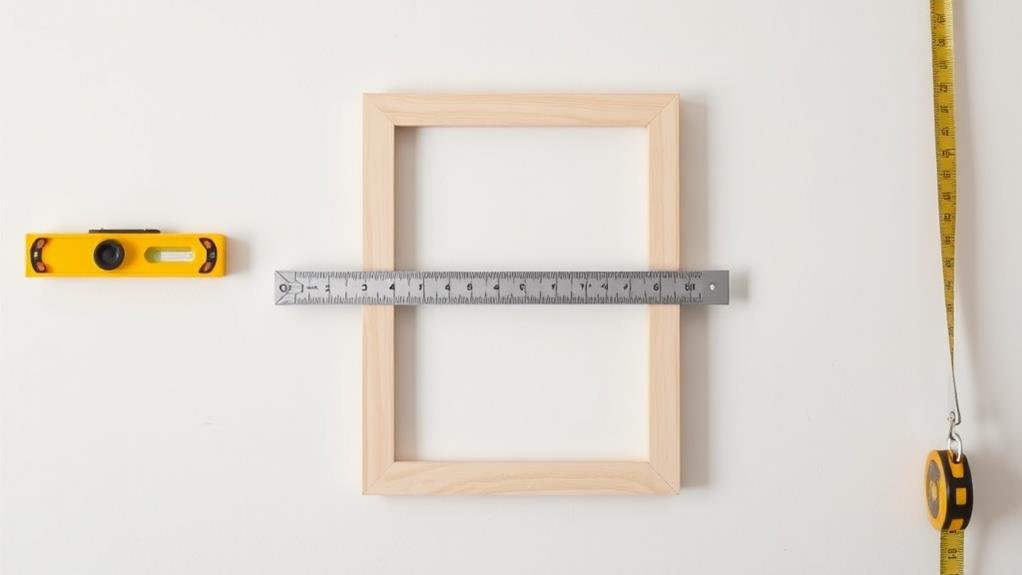
How do you ensure precision and accuracy in your DIY design projects? When it comes to maintaining straight lines and perfectly angled corners, the tools you need are a level and square.
Here's how these tools can be your best friends during your interior projects:
- Level Calibration: Before starting any project, ensure your level is properly calibrated. Place it against a flat surface and check if the bubble indicator is in the center. If not, adjust the screws until it's perfectly level. This step is crucial for accurate measurements and straight lines.
- Square Adjustments: When working with corners or angles, a square is indispensable. Make sure your square is properly set by placing it against a known straight edge and verifying its accuracy. If there are any discrepancies, adjust the square until it aligns perfectly to ensure precise cuts and angles.
- Alignment Check: Use both the level and square in combination to double-check alignments. This practice will help you confirm that everything is in place before moving forward with your project, guaranteeing a professional finish.
Sanding Tools
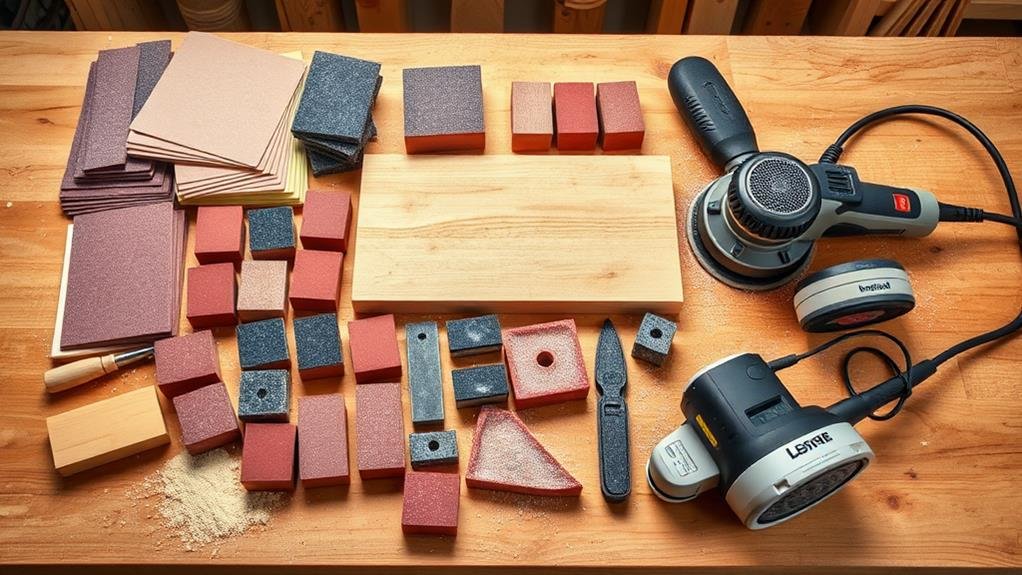
Get ready to smoothen out rough edges and surfaces with the magical touch of sanding tools.
Want to elevate your DIY game? Let's start by exploring various sanding techniques that can transform your projects from rugged to refined.
But remember, always prioritize safety with the right tool selection and precautions to ensure a smooth and hazard-free sanding experience.
Sanding Techniques
With the right sanding tools at your disposal, mastering various sanding techniques can elevate your DIY projects to a professional level.
When it comes to surface preparation and achieving a flawless finish, it's essential to use the correct sanding techniques. Here are three tips to help you refine your sanding skills:
- Progressive Grits: Begin with a coarser grit sandpaper to remove imperfections and gradually work your way up to finer grits for a smooth surface. This progression ensures a seamless transition between sanding stages, resulting in a polished final look.
- Circular Motion: When sanding, apply even pressure in a circular motion to prevent uneven wear on the surface. This technique helps avoid creating dips or bumps in the material, maintaining a consistent finish across the project.
- Use Sanding Blocks: Employing sanding blocks provides stability and control, allowing you to focus on specific areas effectively. Blocks help distribute pressure evenly, reducing the risk of over-sanding or inconsistencies in the surface texture.
Tool Selection Tips
Selecting the right sanding tools is crucial for achieving professional results in your DIY projects. When deciding on sanding tools, consider the type of surface you're working on. A sanding block or sponge is best for flat surfaces, while a detail sander or sanding stick is ideal for getting into corners and tight spaces.
Ensure your sandpaper grit matches the task; coarse grits for rough sanding and fine grits for finishing. To maintain your tools, clean them regularly to prevent clogging and store them in a dry, organized space to prevent damage.
Proper tool organization not only extends their lifespan but also makes them easily accessible for your next project. Remember, the key to successful sanding lies not only in the tools themselves but also in how you care for and store them.
Safety Precautions
For a safe and successful DIY sanding experience, prioritizing safety precautions when using your sanding tools is essential.
Whether you're refinishing furniture or smoothing out walls, keeping safety in mind is paramount.
Here are three crucial safety measures to keep in mind when using sanding tools:
1. Fire Safety: Always ensure your work area is clear of flammable materials before using sanding tools that generate heat.
Sparks from the tool can quickly ignite sawdust or other materials, so have a fire extinguisher nearby just in case.
2. Chemical Handling: Some sanding tasks may involve chemicals like paint strippers or wood stains.
It's important to read and follow the manufacturer's instructions carefully when handling these substances.
Wear appropriate gloves and protective gear to prevent skin irritation or chemical burns.
3. Ventilation: When sanding, fine particles and dust can become airborne.
Ensure adequate ventilation in your workspace to prevent inhaling these particles.
A mask rated for fine dust particles can also protect your lungs from potential harm.
Pliers & Wrenches
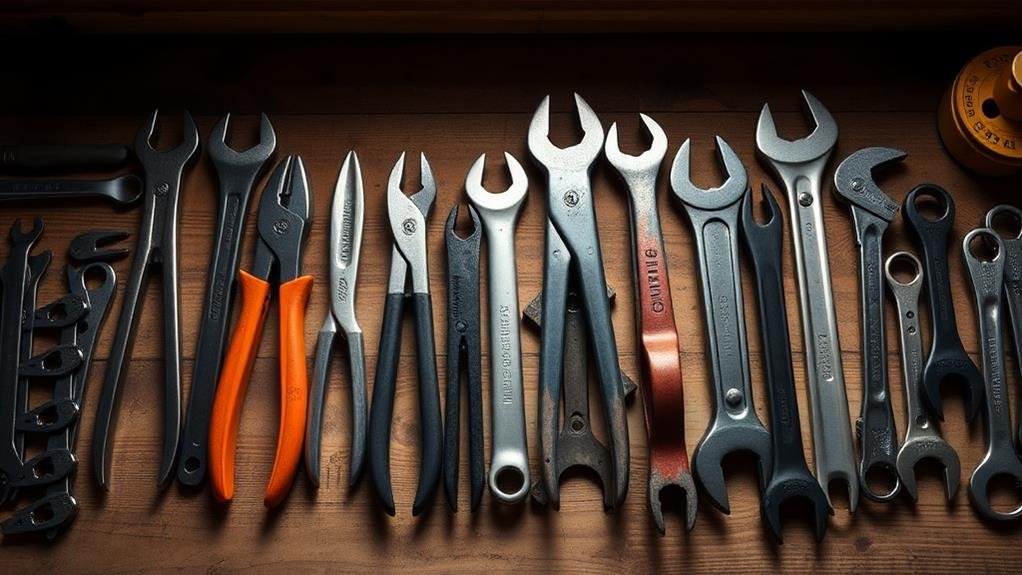
Among the essential DIY design tools that every handyman or handywoman should have in their arsenal are the versatile pliers and wrenches. Pliers come in various types including needle-nose, slip-joint, and locking pliers, each serving a specific purpose in your projects.
They're invaluable for gripping, bending, and cutting wires during electrical repairs, as well as for tightening or loosening nuts and bolts in plumbing tasks. Wrenches, on the other hand, are crucial for turning rotary fasteners like nuts and bolts. They're available in different sizes and styles, such as adjustable wrenches and socket wrench sets, providing flexibility and precision in your work.
When tackling a DIY design project, having a good pair of pliers and a quality wrench collection is non-negotiable. With these tools at your disposal, you can confidently handle a range of tasks from fixing leaky pipes to installing light fixtures.
Hammer & Nails
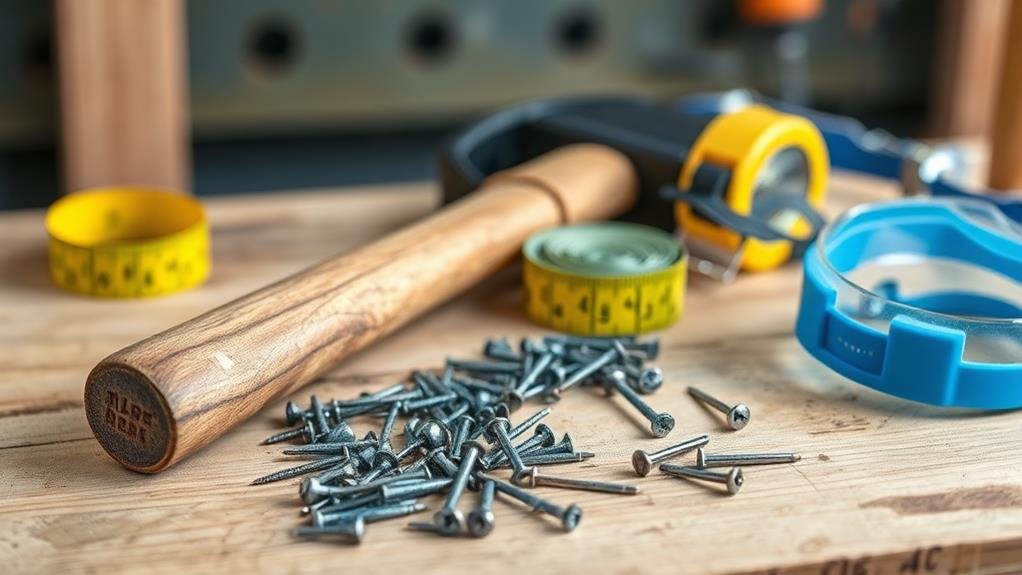
Get ready to elevate your DIY design skills with the classic combo of hammer and nails.
Nail placement is an art form – learn tricks to ensure your nails hit the mark every time.
Master the perfect hammer handling techniques and watch your projects come together with precision and style.
Nail Placement Tips
With a confident grip on the hammer, positioning the nail just right can make all the difference in your DIY project.
Whether you're using finishing nails for delicate trim work or sturdy framing nails for structural support, understanding nail types and spacing is crucial to achieving professional results.
Here are some nail placement tips to help you nail it:
1. Choose the Right Nail Type: Select the appropriate nail type based on the material you're fastening. For example, use brad nails for thin trim pieces to prevent splitting, or choose ring shank nails for increased grip in hardwoods.
2. Mind the Spacing: When driving multiple nails in a straight line, maintain consistent spacing for a neat appearance.
Consider using a spacer or marking tool to ensure uniformity, especially for decorative patterns or functional joints.
3. Angle Matters: For enhanced holding power, drive nails at a slight angle rather than straight in.
This technique, known as toenailing, can provide greater stability, especially when securing joints or connections.
Hammer Handling Techniques
Expertly wielding a hammer is a fundamental skill in the realm of DIY projects, especially when it comes to driving nails with precision and finesse. When it comes to hammer handling techniques, it's crucial to consider various factors such as hammer types, materials, grips, weights, uses, maintenance, safety, and techniques.
Firstly, hammer types vary from claw hammers to ball-peen hammers, each serving specific purposes. Choosing the right hammer material, whether wood, steel, or fiberglass, can impact both durability and comfort during extended use.
Different grips, like the straight, pistol, or hammer-offset grip, offer versatility based on the task at hand. Hammer weights can range from lightweight for delicate tasks to heavier options for more forceful drives.
To ensure longevity and effectiveness, regular hammer maintenance is key. Keep your hammer heads clean and rust-free, and replace worn-out handles promptly.
Safety should always be a priority, with proper eye protection and caution during swinging motions. Experiment with different hammer techniques to find what works best for you, whether it's aiming for the center of the nail head or adjusting your swing strength.
Mastering these hammer handling techniques will elevate your DIY projects to a whole new level of craftsmanship.
Screwdriver Set
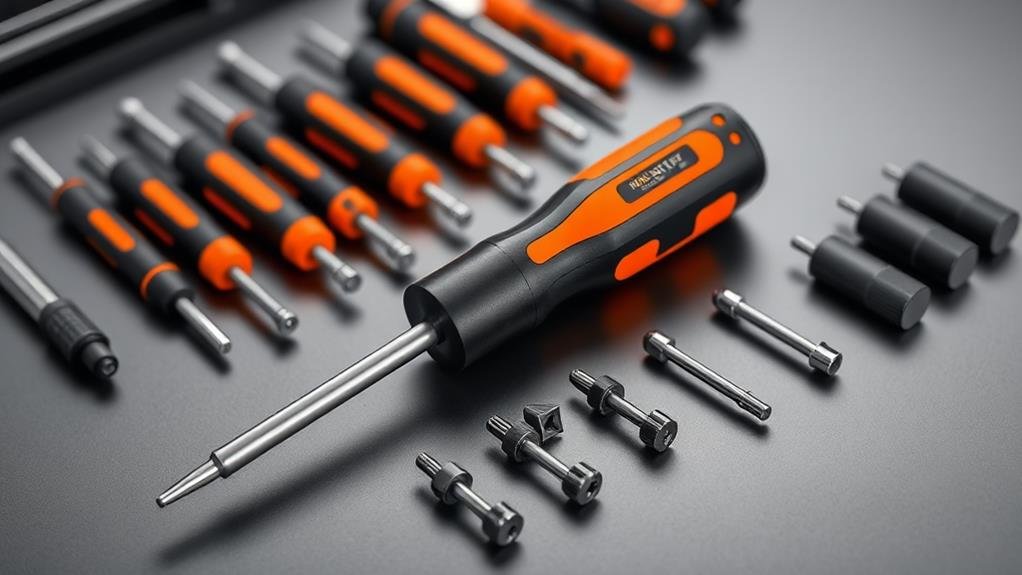
Crafted from high-quality materials and designed for versatility, the Screwdriver Set is an indispensable tool for any DIY enthusiast.
Here's why you need one in your toolkit:
1. Screwdriver Types: A good screwdriver set contains various types of screwdrivers such as Phillips, flathead, and Torx, ensuring you have the right tool for any screw you encounter during your projects.
2. Screwdriver Maintenance: Keeping your screwdriver set well-maintained is crucial for its longevity.
Regularly cleaning the screwdrivers, lubricating the hinges, and storing them properly will ensure they remain in top condition for years to come.
3. Ergonomic Design: Many modern screwdriver sets come with ergonomic handles for a comfortable grip and reduced hand fatigue during prolonged use.
This design feature is essential for those long DIY projects that require a lot of screwing and unscrewing.
Investing in a quality screwdriver set won't only make your DIY projects easier but also more enjoyable.
Staple Gun
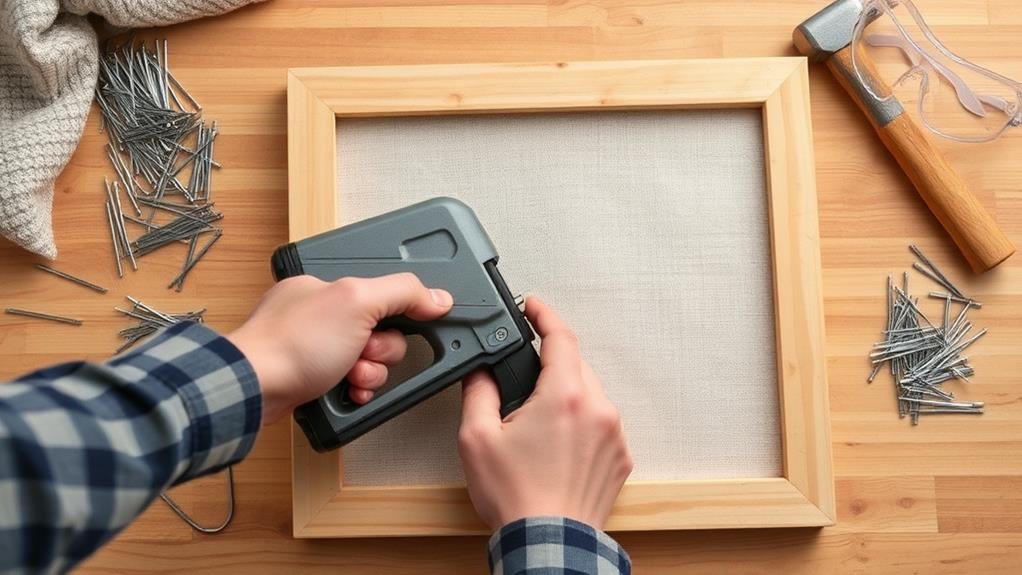
A staple gun is a versatile tool that can revolutionize your DIY projects, making tasks like upholstery, woodworking, and crafting a breeze. When choosing a staple gun, consider manual, electric, or pneumatic types based on your project needs. For basic upholstery or simple woodwork, a manual staple gun will suffice, while electric or pneumatic options are ideal for heavy-duty tasks.
To ensure safety when using a staple gun, always wear protective eyewear and keep your fingers away from the staple exit point. Regular maintenance, such as lubrication and checking for jams, will prolong the life of your staple gun.
Staple gun projects range from reupholstering furniture to creating DIY art pieces. If you don't have a staple gun on hand, consider using a hammer and nails as an alternative.
When troubleshooting, check for jammed staples or issues with the firing mechanism. Some popular staple gun brands include Arrow, Stanley, and Bostitch.
Mastering staple gun techniques will enhance your DIY skills and allow you to tackle various projects with confidence.
Utility Knife

With its sharp blade and ergonomic design, the utility knife is a must-have tool for any DIY enthusiast.
This versatile tool can handle a variety of cutting tasks with precision and ease.
Markdown List:
- Safety First: Always retract the blade when not in use to prevent accidents. Additionally, make sure to wear protective gloves when handling the utility knife.
- Blade Maintenance: Regularly check the blade for any signs of wear or dullness. Replace it when needed to ensure clean and precise cuts.
- Versatile Uses: From cutting wallpaper to trimming carpets, the utility knife is indispensable for various DIY projects around the house.
Conclusion
Now that you have all the essential tools for your DIY design and interior projects, you are ready to tackle any task with confidence and style. From measuring to cutting, drilling to painting, safety and assembly – you have everything you need to bring your vision to life. So go ahead, grab your tools and let your creativity shine bright like a newly hammered nail in the design world.